I'm still tying to get to grips with Photoshop Elements9, never mind CS versions! Elements seems to have so many hidden fixes, and so many ways of achieving the end result, that I feel, if I can get to grips with all its inbuilt tools and facilities, it should be enough for most of my photographic needs.
I have been using Elements9 for over one year now, and like a lot of users, had a total mental blank with regards its most important area, that of Layers and Layer masks, so I'm burning the midnight oil, trying to get to grips with it, from the many training videos I have on Elements, it never seems to amaze me how many fantastic things can be achieved.
The first photo below is of a very good friend of mine, whom I photographed at an event in the local pub, but the background was not very special, so as she lives in Lower Cromane, a most beautiful area of Co Kerry, I thought a nice cloud sunset, taken in Lower Cromane one evening, would make a better background. Then using Layers and masks, I changed the background, I actually was quite chuffed with my first try at Layers and Layer Masks, hopefully more will follow! they say practice makes perfect! well not always, but it sure improves your technique.
I will add some text to each effort as to how I achieved the results, and if any Photoshop experts have any comments or better ways to get the results, I would appreciate your comments!
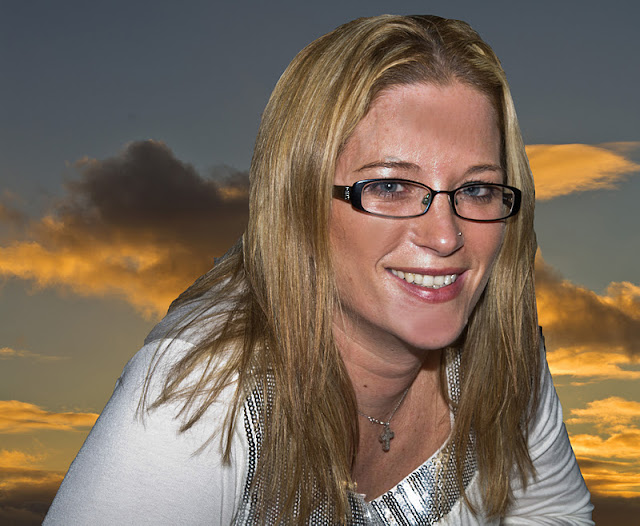 |
| My good friend Clair. |
Changing a background using Layers & Layer Masks in Elements 9.
1. Open the Photo whose background you want to change, and also the photo to use as the new background.
2. Click on the main photo and make a selection of the area you wish to add the new background to.
3. Click on the Layer mask icon at the bottom of the layers panel, (you can close down the adjustment box that opens), the new mask will appear above the main photo.
4. Click on the background photo, go Select-Select All, Then Copy.
5. Now re open the main photo, and click in the area you want to replace, and ctrl V, the new background photo will now appear as the top photo in the layers panel, this now requires to be moved below the main photo at the bottom of the layers panel, but before this is possible, you will need to unlock the main photo by double clicking on the lock icon, then clicking OK, you can now move the background photo below it.
6. Next move the Layer mask in between the main and background photo, your main photo should now be at the top of the stack.
7. Now go to Layers-Create layer mask, the new background is now dropped in!
8. Save and close all.
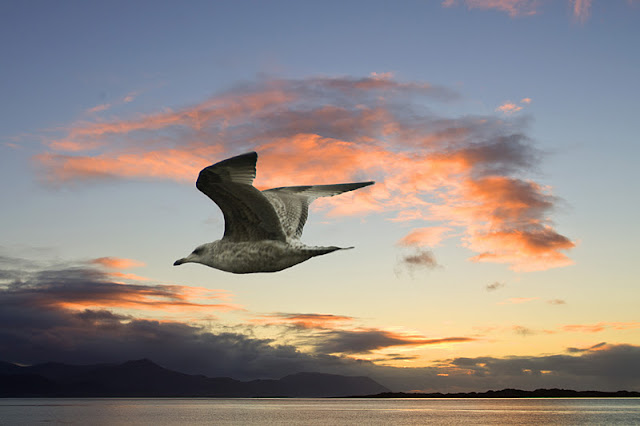 |
| This bird was in a very bland sky, so a new background was dropped in by the method above, |


